Thursday, 4 June 2015
Braised Preserved Mustard with Pork Shoulder 梅菜焖猪颈肉
Ingredients
300gm pork shoulder, sliced
1/2 tsp soy sauce
600gm preserved mustard (I used salted type)
5 cloves garlic, lightly chopped
2 slices ginger
Sauce
1/2 tbsp dark soy sauce
1 tbsp soy sauce
2 tbsp shaoxing wine
30gm rock sugar
600ml water
Method
1) Marinate pork with 1/2 tsp soy sauce for half an hour.
2) Wash away thoroughly the salt on the preserved mustard. Then boil the preserved mustard in a pot for 2 minutes. Leave it in pot to soak for 10 minutes. Wring the excess water from the preserved mustard and cut it up roughly.
3) Heat oil in pan on high. When hot, put in pork and stir-fry for 2 minutes. Then add in garlic and ginger and continue to stir-fry for another 1 minute.
4) Add in green mustard and continue stir-fry for 2 minutes. Add in sauce and let boil.
5) When sauce bubbling, turn heat low and let simmer for 1 hour.
6) Dish out and serve with hot rice ... it's heavenly! This dish taste even better the next day!
Recipe adapted from http://www.noobcook.com/mei-cai-kou-rou/2/
Wednesday, 3 June 2015
One Pot Cooked v2 一㷛熟
![]() |
Cooked this with brown rice. Should add more liquid and some sesame oil as brown rice tends to be more dry |
Marinate
300gm boneless skinless thigh, cut into small pieces
1 tbsp soy sauce
2 tsp dark soy sauce
2 tsp sea salt
Dash of white pepper
Others
4 tbsp oil
1 tsp sea salt
200gm bunashimeji mushrooms
5 cloves garlic, chopped
2cm ginger, chopped
1-2 small carrot, chopped
1-2 chinese sausage (lap cheong), chopped
4 cups rice grain (I used brown rice)
500ml chicken stock + additional water according to your usual way of cooking rice with your rice cooker
Method
1) Marinate chicken pieces with soy sauce, dark soy sauce, sea salt and white pepper for one hour.
2) When ready to cook, heat 2 tbsp oil on high heat. Add in mushrooms when oil is hot and stir-fry for 2-3 minutes. Then add in 1 tsp sea salt. Toss and mix well. Dish out and set aside.
3) Heat another 2 tbsp oil in pan on high heat. When oil is hot, add in marinated chicken pieces. Stir-fry on high heat for about 2-3 minutes.
4) Turn heat to medium, push meat aside. Add in sugar, garlic and ginger and stir-fry for one minute. Then add in carrot and chinese sausages. Continue stir-fry for 3 minutes. Then toss and mix everything together. Dish out and set aside.
5) Wash and drain rice grains in rice cooker pot. Then add in the chicken stock. Top up with water accordingly till usual amount when you cook rice in rice cooker.
6) Add in the cooked mushrooms and the stir-fried chicken with sausages and carrots. Put the rice cooker pot in, turn on the rice cooker, choose the rice function and let the rice cooker do it's job ...
*Note to self: Add 2 tbsp on sesame oil for more fragrance ...
Tuesday, 2 June 2015
Soft and Fluffy Hershey Sponge Cake
I have came across some recipes that made it sound so difficult to bake this. But this one is the easiest so far in terms of ingredient, measurement and it's method. Definitely a keeper ...
Ingredient (18cm Pan)
3 eggs white (I used 60gm egg)
120gm castor sugar
3 eggs yolk (I used 60gm egg)
80gm cake flour
50ml milk
30gm butter
20gm Hershey cocoa powder
Method
1) Add egg white into the mixer bowl. Ensure bowl is clean and no traces of water or oil.
2) Whisk using stand mixer till the egg white is smooth (no bubbles). Add half of the castor sugar in while continue whisking. When the egg white become fluffy, add the rest of the sugar. Continue to whisk till stiff peak is formed.
3) Add in egg yolks. Change to hand whisk and gently whisk till egg yolks are all incorporated.
4) Sift in cake flour. Use a spatula, turn and fold batter till flour are incorporated. Do not use the whisk.
5) Add milk and butter into a microwave-safe container. Cover and microwave high for about 30 seconds to 1 minute, until butter melted.
6) While the milk & butter mixture still hot, sift in cocoa powder. Then stir till cocoa powder completely dissolved. Make sure there is no lumps.
7) Add the melted cocoa mixture into the egg batter. Turn and fold with spatula till all are incorporated. "Dig" from the bottom and fold it up to ensure bottom are also well mixed. Do not use beat or whisk the batter or the cake will not be soft and fluffy.
8) Pour batter into a lined cake pan. Then bang the cake pan on the work top a few times to burst air pockets. Wiggle the pan to smooth out the surface.
9) Bake in preheated oven at 170 degree Celsius for about 35 minutes. I used a convection oven which does need preheating.
10) Test with a skewer. If skewer comes out clean cake is done. As soon as the cake is done, drop the pan from 20-30cm height onto the worktop to prevent cake from shrinking.
11) Then turn the cake upside down onto flat surface. Leave it for 2-3 minutes.
12) Then remove the pan. Turn the cake over and cool on rack.
13) Slice only when it is completely cooled.
Recipe adapted from https://cookpad.com/us/recipes/167970-moist-light-chocolate-sponge-cake
![]() |
3 eggs white (I used 60gm egg)
120gm castor sugar
3 eggs yolk (I used 60gm egg)
80gm cake flour
50ml milk
30gm butter
20gm Hershey cocoa powder
Method
1) Add egg white into the mixer bowl. Ensure bowl is clean and no traces of water or oil.
2) Whisk using stand mixer till the egg white is smooth (no bubbles). Add half of the castor sugar in while continue whisking. When the egg white become fluffy, add the rest of the sugar. Continue to whisk till stiff peak is formed.
3) Add in egg yolks. Change to hand whisk and gently whisk till egg yolks are all incorporated.
4) Sift in cake flour. Use a spatula, turn and fold batter till flour are incorporated. Do not use the whisk.
5) Add milk and butter into a microwave-safe container. Cover and microwave high for about 30 seconds to 1 minute, until butter melted.
6) While the milk & butter mixture still hot, sift in cocoa powder. Then stir till cocoa powder completely dissolved. Make sure there is no lumps.
7) Add the melted cocoa mixture into the egg batter. Turn and fold with spatula till all are incorporated. "Dig" from the bottom and fold it up to ensure bottom are also well mixed. Do not use beat or whisk the batter or the cake will not be soft and fluffy.
8) Pour batter into a lined cake pan. Then bang the cake pan on the work top a few times to burst air pockets. Wiggle the pan to smooth out the surface.
9) Bake in preheated oven at 170 degree Celsius for about 35 minutes. I used a convection oven which does need preheating.
10) Test with a skewer. If skewer comes out clean cake is done. As soon as the cake is done, drop the pan from 20-30cm height onto the worktop to prevent cake from shrinking.
11) Then turn the cake upside down onto flat surface. Leave it for 2-3 minutes.
12) Then remove the pan. Turn the cake over and cool on rack.
13) Slice only when it is completely cooled.
Recipe adapted from https://cookpad.com/us/recipes/167970-moist-light-chocolate-sponge-cake
Tuesday, 19 May 2015
Sweet Milk Bun
I am a lazy bum so I knead using my kitchen machine with the dough hook. And instead of sprinkling flour on top I used icing sugar instead. Although it uses condensed milk but the end result is not sweet at all. The icing sugar on top give it a little sweet taste so the bun can be eaten as it is.
The air-fryer seems to produce prettier looking buns ... :)
![]() |
Baked using my Philip Air Fryer @ 140 degree Celsius for about 20 minutes |
![]() |
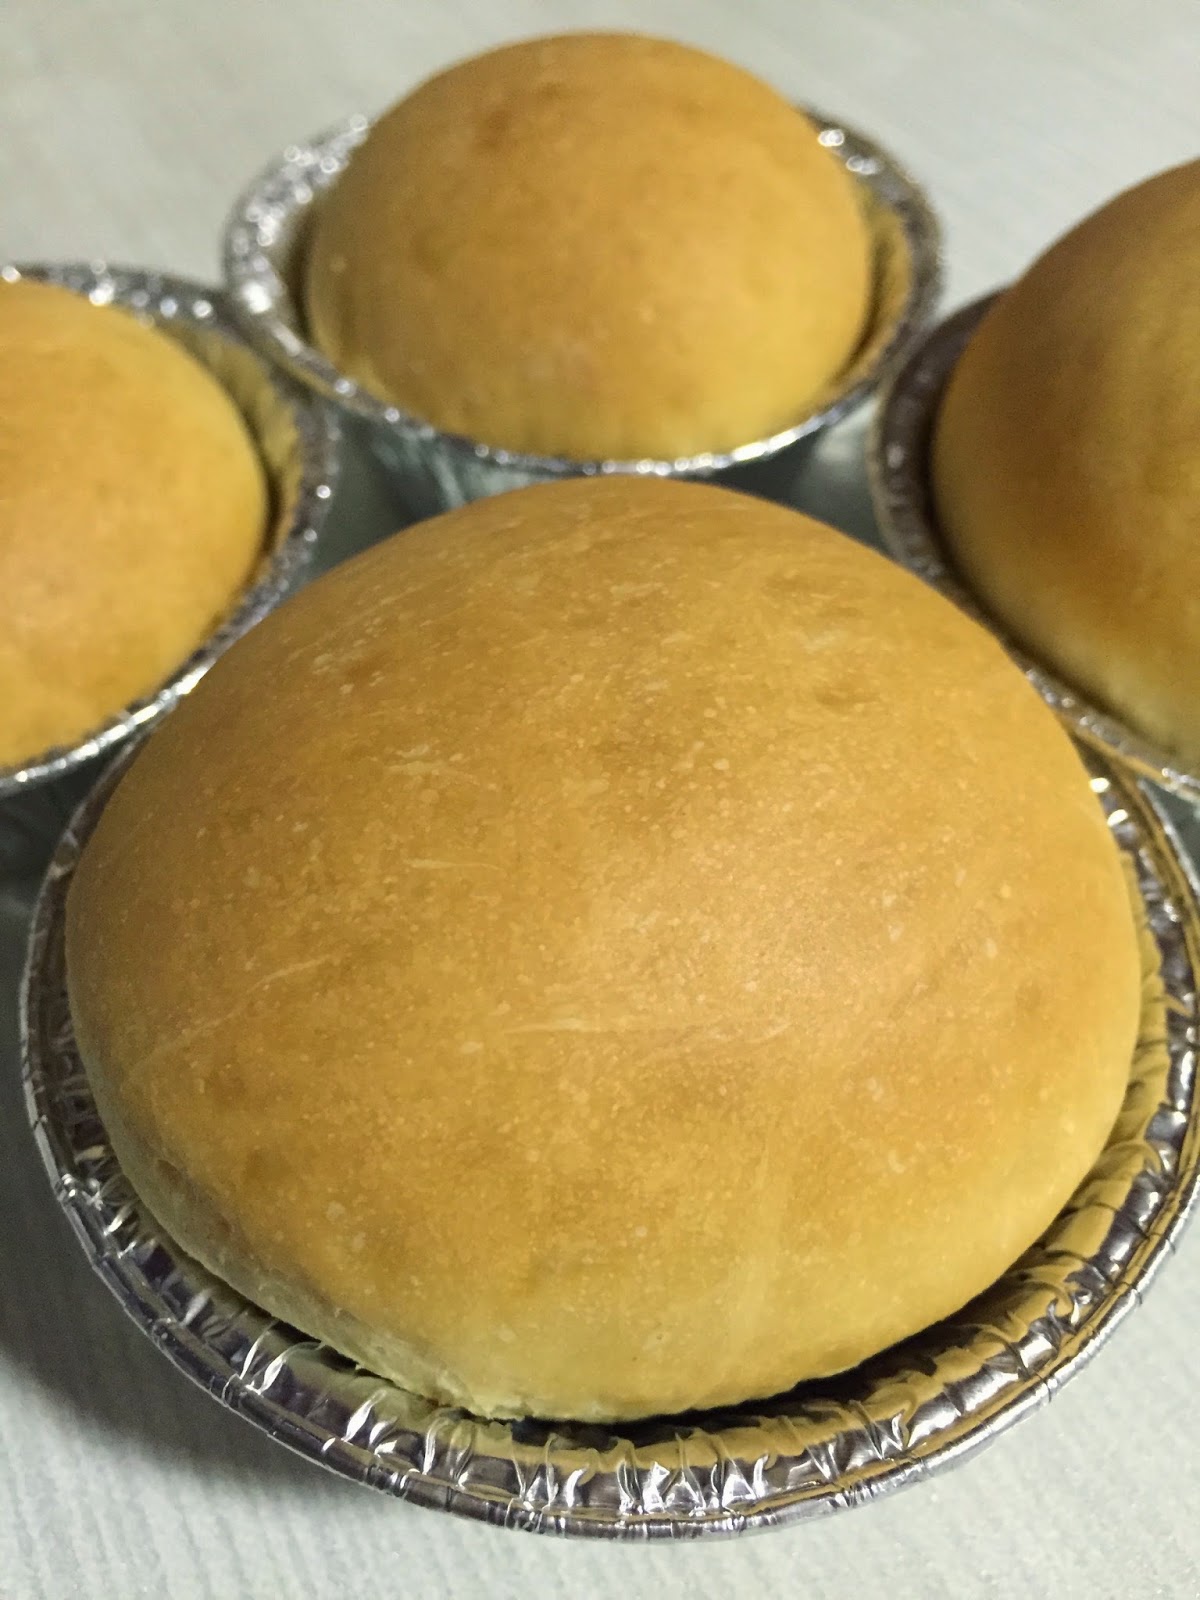
Baked using my convection oven @ 150 degree Celsius for first 10 minutes, 120 degree Celsius for another 10-15 minute |
![]() |
Baked with Philip Air Fryer @ 140 degree Celsius for 20 minutes (may reduce to 15-18 minutes for lighter shade of brown). This one no icing sugar on top but with chicken floss filling. |
Ingredients
150gm fresh milk
20g condensed milk
3/4 tsp instant yeast
225g bread flour
25g top flour/cake flour
40g castor sugar
25g beaten egg
1/4 salt
30g unsalted butter
Some icing sugar to sprinkle on top
Method
1) Mix fresh milk and condensed milk. If fresh milk is cold from fridge, microwave fresh milk on high for 10sec. Repeat the 10sec 2-3 times. The milk should be just a little warmer than room temperature (too hot will kill the yeast).
2) Sprinkle yeast on milk mixture (do not stir). Cover and let it rest for 15 minutes. You will see the mixture foamed up at the end of 15 minutes.
3) Mix all dry ingredient together in the mixing bowl. Pour in the foamed up yeast mixture and the beaten egg in. Use a wooden chopstick stir everything together until all are incorporated. Set aside for 10 minutes.
4) Then use the kitchen machine with a dough hook, knead at speed 2 until the dough become smooth. About 10 minutes.
5) Then rub in the butter. Continue to knead till the dough reach the "window pane" stage (this is when you stretch the dough it becomes so thin that you can almost see through it without breaking). It took my machine total about 18 minutes. I alternate speed 2 and speed 3 for 5 minutes each, with a one minute rest when alternating the speed. This was because kneading bread dough is quite heavy duty and I don't want my kitchen machine to break down.
6) Shape and smooth out the dough surface. Transfer the dough to a lightly oiled bowl. Cover and proof for 1 hour, until it is double in size.
7) Sprinkle some flour on top of the dough and the worktop. Move dough to the work top. Punch down the dough to release trapped air.
8) Divide dough into 8 equal portions (or according to size you want). Roll and smooth each dough and put it on a baking tray. In my case I put some in individual baking cup.
9) Cover and proof for another 45 minutes in the closed microwave (do not turn on the microwave).
10) Sprinkle icing sugar on top. Then bake it ...
To make chicken floss buns
11) After step 8, roll out each dough, fill in chicken floss, wrap and close the seam by pinching it. Put the bun on baking tray, seam side down.
12) Cover and proof for another 45 minutes in the closed microwave (do not turn on the microwave).
13) Bake in Philips Air Fryer @ 140 degree Celsius for 15-18 minutes. Or in preheated convection oven @ 140 degree Celsius for 15-18 minutes. Can brush egg wash on dough before baking for shiny buns.
Recipe adapted from My Mind Patch.
Sunday, 3 May 2015
Cantonese Egg Tart
My egg tarts never failed to become Portuguese tart no matter how I tweak my oven temperature. Oh well at least it still tastes delicious ...
Ingredients
![]() |
Slightly better looking after I adjust the temperature again ... 200 degree C for 7 minutes, then 150 degree Celsius for another 15-20 minutes |
![]() |
My girls love it ... they do't mind the ugly look |
Tart Shell (Makes about 10-12 Tarts)
200g plain flour (plus 2 tbsp)
25g cake flour
125g unsalted butter, softened
50g icing sugar
1 egg, whisked
Dash of vanilla extract
* Dough can be kept in fridge to bake when want to serve
Custard Filling (Makes about 8 Tarts)
240g beaten eggs
160g sugar (I find it too sweet. Next round will reduce to 120g)
480ml fresh milk
2 tsp vanilla extract
* Filling can be kept in fridge to bake when want to serve
Method
To Prepare Custard Filling
1) Use hand whisk and whisk sugar with egg till sugar melted.
2) Add vanilla and milk. Whisk till evenly mixed.
3) Sieve the mixture (remove big bubbles) into a container with a spout. Let mixture rest for an hour or so to allow the small bubbles subside.
To Prepare Tart Shell
1) Cream butter and sugar with hand mixer till smooth, fluffy and light in color.
2) Add in whisked egg and vanilla extract. Mixed well.
3) Sift in both flour. Then knead all ingredient into dough.
4) Measure about 32g of dough. Roll to a ball, then flatten slightly on palm. Put the flatten dough into the tart mould. Then press the dough upward to cover whole mould (See picture below). Repeat for every tart moulds.
To Bake
1) Preheat oven to 200 degree Celsius.
2) When all tart shells are ready to bake, pour the custard filling slowly into the tart shells.
3) Then bake in preheated oven at 200 degree Celsius, for about 7 minutes, or until the edge is slightly brown.
3) Lower heat to 150 degree Celsius. When the custard starts to puff up, open oven slightly and continue to bake for about 10-15 minutes, until the custard cooked through.
Note:
1) The method is adapted from http://en.christinesrecipes.com/2009/03/cantonese-egg-tarts-recipe.html. But my oven never manage to produce the correct end result :(
2) Custard filling is adapted from http://kitchentigress.blogspot.sg/2012/10/hong-kong-egg-tarts-video.html
3) The oven temperature here are set according to my oven. May need to adjust accordingly with different oven.
Subscribe to:
Posts (Atom)